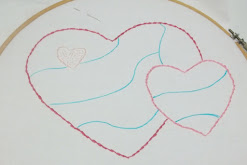
When I posted 2 weeks ago, I had the outline of my heart logo done in the stem stitch and the tiny heart ‘filled in” with a seed stitch. Now since I was creating a sampler (of sorts), I decided I needed more line or outline stitches displayed.
So I randomly drew some curved lines through each of the
bigger hearts. I thought curved lines
would be more interesting to look at and a little more challenging to stitch.
(I tend to use the disappearing markers when marking my embroidery, especially
on light colored fabric. )
Now I needed to decide on the stitches. This is always my most difficult decision to make when working on an embroidery piece of my own. I want to use them all but usually end up going with the back stitch since that is the one I can do without much concentration. I usually embroidery when I just need to relax and not think too hard. So my first decision was not to use the back stitch.
I opened one of my embroidery books and just started looking at stitches. (Just a note, this won’t be a tutorial on stitching as teaching embroidery is not one of my strong point. If you search the internet, you can find picture and video tutorials that do a much better job than I could ever do. Trust me on this.)
The first stitch I did was called the cable stitch also known as the alternating stem stitch. That is what it really is. Where the stem stitch is taking a stitch on top of the previous one, this stitch alternates one stitch on top, the next below. (You will find if you are just beginning embroidery that many stitches have a number of names. It can be confusing at times. For example, the stem stitch which I used to outline the hearts is also called the outline stitch or the crewel stitch.)
I then used the fern stitch (or fern leaf stitch). I liked how it looked in my book but on the
heart it looks a bit like the stitching of a baseball.
The next stitch is a fun one because it uses two different
colors, the whipped running stitch. The
running stitch is the most basic stitch for embroidery or any kind of sewing
really. What makes this one different is
that a second thread is “woven” underneath the running stitch. Gives it a bit of pizzazz to a very basic
stitch.
The last line stitch in the dark pink is the chain
stitch. This is another stitch, like the
stem stitch, that I like but sometimes have trouble with. I can’t always get the ‘chains’ to be the
same size. But it is a great stitch.
I only did two outline stitches in the medium pink heart. It really wasn’t that big to do much
more. I picked another favorite, the feather
stitch (also known as the Briar stitch).
When I was stitching it, it reminded me of an open sort of
alternating chain stitch. It gives a
fancy look.
And I saved my favorite stitch for last. I learned it as the Twilling stitch but it is also known as the Double knot stitch, the Old English knot stitch or the Palestrina stitch. It is a outline stitch made of a fancy type knot. It is a little difficult but gives such a great outline look especially when done with a thick thread. And it will impress those who don’t know much about embroidery. I used it in a quilt once and overheard some ladies at a quilt show where my quilt was displayed, talk about how impressed they were that I made so many French knots. They were impressed.
So those are the line designs of my Heartfully Cheryl
logo. Next week I will add some filler
stitches in between the lines.
©2019, 2024 Cheryl E. Fillion


No comments:
Post a Comment