Friday, December 30, 2016

The Bucket List

How many of you have a bucket list?  You know that list of things you want to do before you kick the bucket. If you have a list, that’s great. Start doing some of the things on your list.  If you don’t have a list, what is it you want to do in your life before you die?

You hear of many people who go sky diving or bungee jumping.  But what if that is not your style, what do you want to do?  Do you want to travel?  See the Grand Canyon? The Eiffel Tower?  Do you want to learn something new?  Not all of your bucket list needs to be WILD adventures; some can be MILD adventures like learning to bake bread.

I didn’t call my list a bucket list.  It was known more as a “Some day I’d like to” list.  And not everything on my list is an adventure or even expensive.  I want to learn to bake bread.  I’d really like to finish all the quilts I have started (and maybe some quilts I am thinking of starting).  I would love to read all the books I presently own. And yeah, I would love to travel.

Maybe as a New Year’s Resolution, you could start planning your bucket list. Think of the things you would like to do in your life.  One might be going to New York City for New Year’s Eve.   What is it you would like to learn?  A new language, a new art style, a new craft?  What is it you want to do?

As I mentioned before, where would you like to travel?  It doesn’t have to be to another country.  Have you seen everything to see in your city?  Have you participated in some local event you have always been interested in?  The college where I work does the Nutcracker Ballet every December.  I love that ballet but in the 28 years I have worked there, I had only gone once until this year.  I had so much fun I think now it will be an annual event.

If you can’t think of anything for your list, ask family and friends what you might have mentioned to them about wanting to do.  You might not remember but they will.  Or think back to what you liked to do as a child.  Did you sing into a hairbrush?  How about taking singing lessons or join a choir?  Did you wear out box after box of crayons but never took art lessons?  Take some art lessons.  Your local college might offer continuing education classes or a craft store might have a class or two.  Do you like the symphony; buy a ticket.

Your bucket list doesn’t have to be a permanent list.  You can change the items as you go through life.  You can add or subtract things as your interests change.   But do make a list.  It is a great way to make sure your life is enjoyable and has meaning. And if you are like me, you will be able to make a great loaf of bread.


© 2016 Cheryl Fillion


Friday, December 23, 2016

Holiday Wishes

This is one of the most wonderful times of the year. There are the various holidays that sneak up  at year’s end.  There is the changing of the seasons from autumn to winter which for some means snow and hot chocolate and for others might mean sunshine and lemonade.

So for what ever the end of the year means to you, I hope you are with family and friends, exchanging gifts and cards, involved in sledding or swimming and are having a wonderfully creative time.

Remember to involve all your senses in your holiday activities.  Not just listening to the laughter of your family or the carols heard on the radio, but also tasting new things with new recipes or new restaurants, smelling all the wonderful fragrances from the pine tree to the gingerbread men in the oven to the sights of holiday lights or country sunrises.  And don’t forget to touch, not just the gifts that someone has given you but the someone themselves.  Enjoy those hugs and kisses.

I hope all of you have a great holiday whatever and wherever you are celebrating it and you gather up all kinds of memories and ideas to last you a year of creating.

Happy Holidays (whatever holiday you celebrate).

Cheryl

©2016  Cheryl Fillion 


Friday, December 16, 2016

The Gift That Keeps on Giving

Looking for a gift for someone?  Having a hard time finding the right thing?  How about giving them an activity instead?  What if you introduced them to a new craft or art form?

Giving crafts as gifts is the best way to create a lifelong memory.  My little spool knitting doll was given to me as a gift when I was a child.  I enjoyed it then and still do.  The first crewel embroidery I ever did was an embroidery kit.  The instructions, the yarn, the needle, printed fabric were all included in the kit.

Kits where everything is included (even any tools like needles) is the best way to start someone on a new creative adventure.  My love of needle felting came with a kit that included step by step picture instructions, the roving and the needle.  I don’t think I would have tried it if I had to find all the supplies separately.  Now I have gone crazy for needle felting.

If a kit isn’t available, why not sign them up for a class.  Many fabric and craft stores provide classes as well as libraries, community centers or non-profit organizations (YMCA, for example).  If there is something you can teach your gift recipient, buy them all the supplies they need to start lessons with you. This way they have their own tools and supplies.

Or give a gift card to a craft or hobby store, so they can choose their own craft.  And to add to your fun, go with them when they spend their gift.  It is another way you can share the experience.

Remember to start off small.  If they want to learn to quilt, start out with a pillow or small wall hanging.  You don’t want to buy all the supplies for a big quilt, only to find out that quilting wasn’t as enjoyable to your gift recipient and they get bored with it.

Not only is giving something crafty a great gift, it can lead to a lifetime of enjoyment. As the saying goes, it is a gift that will keep on giving. 

PS:  there is also nothing wrong with a brand new box of crayons for crafters of all ages.

©2016 – Cheryl Fillion

Friday, December 9, 2016

The Legend Of A Christmas Spider

Did you know that in the Ukraine it is not unusual for a family to do a thorough cleaning of their house for the Christ child's visit?  But if you come across a spider web, do not destroy it. 

There is a legend that many years ago a woman was cleaning her house for Christmas and banished even the spiders away.  After everyone was in bed, the spiders came back to see the decorated tree and as they wandered along the branches, they spun a web. 

When the Christ child came to this house, he saw the web and loved it, for he loved even the lowest creature.  He knew the woman of the house wouldn’t like it and so upon touching the web it turned to silver and gold.  So in the Ukraine, you are likely to see a spider among the decorations of a tree.

I enjoy that legend so much I make fabric yoyo spiders for my tree.  They are quick and easy ornaments to make.


You need a little fabric; the amount depends on how big you want the finished yoyo to be.  Remember from my yoyo tutorial, the fabric you cut must be 2 time +1/2” bigger than the finished yoyo.   So cut your fabric to the size you need and sew it up. Once it is sewn, you now have the body of the spider.   The yoyo hole will be the front of the spider (it makes it look a bit like a mouth).


Turn the yoyo to the flat side; this is where you will glue the legs.  You can use pipe cleaners or yarn to be the leg.  Make them however long you want them to be. I cut them in one length and sew them across the back to each end is sticking out the side of the yoyo. You will need 4 pieces so the spider will have 8 legs.


Turn the yoyo around so the hole is facing up and glue two tiny beads, buttons or googly eyes above the hole for the eyes.  


Add a string loop at the top and you now have a Christmas yoyo spider.


© 2016   Cheryl Fillion


Friday, December 2, 2016

An Ornament Tradition

As a teenager, my family would spend Christmas Day with friends.  My mom, Jan and her friend Judy had grown up together, meeting across the fence of their houses when they were three.  Judy’s younger sister Geri soon joined the two girl friends.  So after they had grown, all three of our families would spend the day together.

On the Christmas when I was about 14,  I wanted to make a little gift for each of the ladies there (which included Judy and Geri’s mother and Geri’s mother-in-law).  In one of the women’s magazines at the time there was instructions for a little paper doily angel.  Her dress was made with a big paper doily folded into a cone.  Her sleeves and hat were cones made of smaller doilies.  Her head was a Styrofoam ball with braided embroidery floss hair and sequin star eyes.  She wasn’t fancy but she was cute and everyone liked the angel they received.

The next year I made another ornament for the group and  there started a tradition I have kept up each year.  Those who receive my yearly ornaments have expanded to other family members and friends.  What started with 5 ladies now has expanded to a group of 30 family, friends and work colleagues.

Through the years the ornaments have reflected what ever craft or technique I was involved in that year.  There are ceramic ornaments, needle point, braided, spool knitted, woven, quilt techniques (pieced, appliqué, cathedral window, etc).  You can follow the history of my craftiness through my Christmas ornaments.

With the amount of ornaments I make, I try to find something easy and cheap but unusual and something that can be done quick.  I probably could start making the ornaments earlier in the year but who really wants to think of Christmas in July.  Not me.

Those who have received my ornaments for a number of years tell me that they have a special box for the ornaments or hang them together in a group on their tree.  I have seen grown adults clap their hands and say “goody” when I hand them a Christmas card – the usual delivery method of my ornaments.

It is a lot of work but it is one of my personal Christmas traditions that I enjoy.  I have only missed one year of making the ornaments.  It was the year my mother died and my heart really wasn’t in it. But after that year passed, I vowed I would never miss another year.  It didn’t feel like Christmas without my ornament.

This year’s ornament is one I came up with while writing the blog on spool knitting threads and added a little from the blog on Kid’s Crafts at the Farmers market.  After receiving a donation of crochet thread and having some cones of 2-ply yarn (that no matter how much I used never seems to diminish.  I think it reproduces at night) and playing with the sequins from the weather forecasters, I made a little wreath shaped ornament with a sequin circle sewn to the bottom.    It’s been fun spool knitting with three threads.  It makes me want to combine more colors or styles of thread together.

I hope you all start an ornament tradition.  Maybe get the children or grandchildren involved and make wonderful Christmas memories together at the same time. You don’t have to make the amount of ornaments I do but it does make the holiday special for yourself and others.  At least it has for me.  Happy Ornamenting!
My 2016 Ornament


© 2016 – Cheryl Fillion


Friday, November 25, 2016

Nature

One way to encourage your creativity is to spend time in nature.  It doesn't matter where you go or what you do, just make sure you are away from concrete and asphalt.

Talk a walk in the park.  Work in your garden.  Go on a nature hike in nearby woods.  My favorite place is the local zoo.  I love to walk the trails and watch the animals.  Its design helps me feel isolated and I forget I am in the middle of a city.  No street sounds, no city smells.  Just the animals and trees.  Just nature.

Nature heals.  There is a psychological theory that the more we move inside to buildings with central heat and air with windows which don't open and surround ourselves with all the modern conveniences and technology, the more mental illness we will suffer.
   
Nature keeps us grounded. It slows us down, focuses us.  It moves and blooms and grows in its time, not ours. If we want to watch a butterfly, we have to do it now not when our cell phone call is over.  Nature fuels our core of energy, our creativity.

Nature inspires.  I bet there isn't an artist now or in history who hasn't painted, written, danced or sung nature.  Nature shows that there are endless possibilities to everything.  In nature there isn't one bird, flower, or tree but a multitude.  There isn't one color green or purple but infinite shades of each.  One never lacks if one is in nature.


If your creativity is slow in starting or has stalled altogether, spend some time in nature this week. I know it helps me, I have a feeling it will help you.  

                                                                   Floral Coduroy Fabric


                                                          Heavenly Gardener Applique Pattern


© 2016 – Cheryl Fillion


Friday, November 18, 2016

Cookie Cutters Aren’t Just For Cookies

Cookie cutters used to be for Christmas but now there are cutters for every holiday or occasion you can imagine.  But you know you can use cookie cutters for more than just cookies.  They are great shapes for kids crafts, appliqué, needle felting, and punch needle.


pompom ornaments
I use pumpkin, bell and star cookie cutters for kid’s crafts at the market.  I trace the cookie cutter on to paper, scan them on my printer so I can enlarge them to the size I need (although I have pumpkin cutters in various sizes).   I print them out on cardstock, cut them out and punch a hole in the top then add yarn for a hanger.  Give them to the kids to glue whatever they want on it or just color them.  I was given pompoms of various colors so we have been using those.  


cat applique
witch applique


I have also used them for appliqué.  Again just trace the cookie cutter; cut it out on fabric and sew it down.  I like the cat and witch cutters my mom had as we were growing up.  They were great appliqués for my Halloween quilt (which one of these years I will finish).


punchneedle heart


I enjoy punchneedle embroidery.  Recently I found some tie-dyed embroidery floss and wanted to see how it would look stitched out.  So I took several sizes of my heart shaped cookie cutters and made myself a little heart using the floss.  


needle felted acorn and leaf

Cookie cutters are also a great shape for needle felting.  As long as the cutter is open on both ends, you can place your roving in the cutter and needle felt until the roving takes the shape of the cutter.  Then once you have finished felting it, you can use it as an appliqué, sew a thread hanger through it for an ornament or glue a magnet on the back and put it on your frieg.  (I’ll have a future blog concerning needle felting in a shape.)


make cookies

Making sugar cookies is so much fun and decorating them with children creates memories but using your cutters with fabric and thread (or glue and pompoms) is a way to keep the cookies forever.  Cookie cutters aren’t just for cookies anymore.


© 2016 Cheryl Fillion

Friday, November 11, 2016

Gratitude

A couple of years back, I was going through a rough time.  It seemed like everything was falling apart.  I wanted to emphasize the good in my life.  So I started a daily gratitude list and posted it on my personal Facebook page. 

Research shows that gratitude along with other positive emotions has beneficial affects on our health.  The more one experiences positive emotions, the more our immune system is strengthened and the less stress we feel.

As I started to write my daily gratitude lists, I found that I felt better.  I was happier.  I tended to be more optimistic.  The more I looked at what was good in my life, the less the negative seemed to be in my thoughts.

Gratitude is just being thankful; thankful for the people in one’s life, one’s health, one’s talents, anything that makes life enjoyable.  I don’t always emphasize big things like family, friends, work or my health in my lists.  Sometimes I am just thankful someone invented ice cream or that my fish made me smile or that the sun is out.


Thanksgiving is the perfect time to start a gratitude list. Looking at the things for which you feel gratitude will make you feel better and if nothing else,  it will just make you smile.

Heart Quilt Bloc Fabric


© 2016 – Cheryl Fillion


Friday, November 4, 2016

Fabric Yoyos: Tutorial


Fabric Yoyos are simple to make.  You can go to your local fabric or craft store and find a tool that will help you make all kinds of size or shape yoyos.  Or you can make them the old fashion way with just a circle of fabric.  If you are sewing the yoyos together for a quilt or table mat, you might want to make all the yoyos the same finished size.

To determine the size of circle to start out with, you need to know the finished size you want then to be and cut a circle 2 times plus 1/2” (for seam allowance) of that finished size.  For example, if you want a yoyo 1 1/2” in diameter, cut a piece of fabric 3 ½” in diameter.    


Now fold over the edge (about a ¼” ) of the circle to the wrong side of the fabric and start a running stitch like a basting stitch around the circle. I hide the knot of my thread under the fold of the edge.  (I usually use the same colored thread as the fabric but I am using a contrasting thread here so you can see the stitches.) You can iron the edge down before you start sewing or just fold it over before you take the next stitch. 


I double my thread to make it stronger to pull the gathers.  But if a single thread works for you, go for it.  


One tip I learned is to make the stitches not tiny like quilting stitches but bigger stitches. Mine are usually about ¼”.   When the yoyo is finished, there will be a hole where the stitches are gathered. The bigger the stitches, the tinier the hole.  


You can gather the stitches as you are sewing or wait until you get to where you started stitching.   .  


Then gather up the circle and knot it. I try to get the knot as close to the gathers as I can, then pull the thread through the gathers before I cut it off.  You don’t have the tail of the knot showing in the opening that way


You will probably need to flatten the finished yo-yo out after you have cut the thread. You might have to adjust where the edge fold goes to get the hole in the middle.

And that is your yoyo. Now just make however many more you need for your project.

To sew the individual yoyos together, arrange them in the way you want them.   You can have them so all the gather holes show or have them so that the flat side shows.  Usually I want to see the gathered holes.  I think it is more interesting and more textured.


But occasionally when I am doing an ornament where it might swing around on the hanger, I will alternate the yoyos: one gathered next to one that shows the flat side.  It makes it more symmetrical.


Now to sew the yoyos together: Pick up two yoyos.  If you have all the yoyos facing with the gathered side up, you want to place the flat sides together.  If the yoyos have the flat side up, you want to put two gathered sides together.   If you are alternating a gathered side with a flat side, the yoyos you place together should be a gathered against a flat side.


Now slip your needle through the hole and under the gathers coming out at the edge of the yoyo.


Pull the needle through so the knot is hidden in the gathers.  Pulling the needle through the second yoyo, take a little stitch securing them together (Note: I usually use the same colored thread as my fabric. I am using contrasting thread here so you can see the stitch.)


Take a couple more little stitches to secure the yoyos together.  Make a knot and slip the needle through the gathers of the yoyo (like you did when you created the yoyo) and clip your thread.  That is all there is to it.  Now just repeat the stitches for all the other yoyos until you are finished with your project..


Here is my completed ornament.


©2016  Cheryl Fillion


Friday, October 28, 2016

Yoyos (no, not the toy)

I have two problems.  One, I like fabric.  I make my own clothes, quilts, dolls, pillows and ornaments. I like the feel of fabric and the color and design of fabrics.  All kinds of fabrics - cotton, fleece, satin, wool - tickle my fancy.

My second problem is that my grandmother was a reuser (if that is even a word) and recycler before those terms were officially part of our vocabulary.  She would save to use anything she could.  I remember a big ball of string that had pieces as small as 3” and as large as a couple of feet. Remember when frozen dinners came in aluminum trays with aluminum foil on top.  She saved those pieces of foil to reuse somewhere else  

So what do those two ‘problems’ have to do with each other?  I use every bit of fabric I can, even the smallest of pieces.  My favorite way to use small pieces is by making fabric yoyos.

Now I am not talking about the toy on a string that many people (not I) can make do all kinds of tricks. I am talking about circles of fabric that is sewn around the edge and gathered together to form a little rosette.  Yoyos became popular during the Victorian age, around the late 1800s.  But they became a fad between 1920-1940, because they were easy for women to carry around and do anywhere.  They still today are popular for that same reason.


Depending on the size of the yoyo, they can be used to make all kinds of things.  In the 1920s, bed coverlets were a popular thing to make with yoyos.  I haven’t been that ambitious with my yoyos.

 As well as…


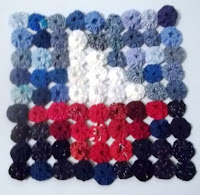
  table mats


   ornaments


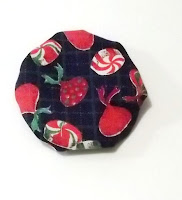
or fabric pins.

Next week I’ll have a tutorial on how to make yoyos.

Here’s a couple of yoyo items from my etsy shop


Friday, October 21, 2016

Spool Knitting: Threads and Knitters

Spool knitting will look different depending on the size of the thread and the size of the spool knitter. You need to take that into consideration when you plan to work on a project.  I found this out when I used crochet thread in my spool knitter hoping for a tight cord but instead I ended up with a loosely knitted one.

To me the size of the spool knitter is the distance between two pegs.  I have one that has pegs about ¼” apart which makes very thin cords and I have another one (which I use most often) where the pegs are about ½” apart.

So I tried an experiment for this blog.  I used the same yarn or perle cotton on both spool knitters knitting about 6 inches.  And here is the difference I found.

In the first picture the cords are knitted with the ¼” pegged knitter.  The blue is 4 ply acrylic yarn (you will recognize the cord from my blog post ‘Spool Knitting Tutorial’). The red-orange cord is done with perle cotton #5.  And the white is done with perle cotton #10.
1/4" pegged knitter coils

In the second picture, the cords are knitted with the ½” pegged knitter. The same yarn and perle cotton was used.  Because these pegs are farther apart the knitting stitches are bigger.  And the thinner thread is even looser in the knitting.


1/2" pegged spool knitter


Depending on the look you want with a knitted cord, you might want a thin thread. Knitting with the ¼ inch knitter give the cord a more delicate look.  But with the 1/2” knitter, the knitting doesn’t seem to hold its shape very well (at least to me.)  What do you think?


©2016  Cheryl Fillion

Heartfully Cheryl Etsy Shop:

Friday, October 14, 2016

The Law of Attraction

Have you ever had a time when suddenly everything you read or heard was about a particular idea?  I am not talking about when you become interested in a subject and seek out information about it.  I mean those times when you pick up a book or turn on the television and there is that particular idea.  Psychologist Carl Jung called this synchronicity.

The idea that has appeared before me in one way or another in the last couple of weeks is what is known as the Law of Attraction.  This is the idea that what you think, feel or create brings to you more of what you think, feel, or create. If you think about flowers, more flowers will appear in your life.  If you think about kindness, more kindness will appear.  It also works with negative ideas but we don’t want to think negative right now.

With that in mind, I find myself wanting to create beautiful quilts and dolls and poetry.  The energy of those beautiful things will then go out into the world and hopefully come back to me. But in the process it will touch others who will then themselves create beautiful things. 

Right now when what you see and hear on television or in the newspaper is about war and crime and hate, take on the Law of Attraction and think, feel, or create those things you love.  The energy of  things you love will go out into the world in many ways and will then prompt others to create things they love and that energy will circle back to you.
© 2016 – Cheryl Fillion

Friday, October 7, 2016

Spool Knitted Pumpkin

I like decorating for all holidays (I go crazy over board at Christmas) but for some reason I really like putting out pumpkins and Jack O’Lanterns for Halloween and Thanksgiving.
Since I have been talking about spool knitting in this blog, I decided I needed a new pumpkin decoration.  This also give me a chance to show how to change colors while spool knitting.

So I pulled out my bigger spool knitter and started knitting with green yarn for the stem of the pumpkin. Now I could finish off the knitting (as described in the blog post ‘Spool Knitting Tutorial’) and then later sewn it to the orange cording for the pumpkin body. But I wanted a continuous cord for this ornament. 


Making the pumpkin stem

This means I have to change color while knitting.  It is easy to do.   When you have the amount of color cording you want ( I knitted about 1 ½ inches), cut the yarn coming from your skein about 3 inches.   Make sure the yarn doesn’t come off the pegs.  

Cut green yarn to add orange.


Lay your next color next to the yarn you just cut and tie the two colored yarn together with a simple over hand knot .  Now continue knitting as before. 

Lay colored yarns side by side. 


Knot the yarns together.


When the knot gets to the knitting, I usually take my knitting tool and push the knot into the center of the cord so it is hidden.


Knot knitted into the coil  
Knot hidden in coil.


When I think I have enough cord, I usually make whatever shape I am planning just to make sure I have knitted enough but I don’t sew it yet.  If I need to do a little more, I do.  I finish off the cord and remove it from the knitter.


Check the size of the shape before finishing cord.
To make my pumpkin, I start making a round shape starting with the end of the orange part of the cord. I fold the edge over maybe ¾” and start stitching at the fold.  I do use a pin to hold the fold together and once I have it stitched, I remove the pin.

Starting the shape.

You can sew the cord together with the yarn you used or regular sewing thread that matches the color of the yarn.  For me the thread is easier to control and if it matches the color, it will blend in with the yarn. (For these pictures I am going to use a darker thread so you can see how I stitch it.) 

I don’t sew right along the edge but try to hide my stitches in the area between cords.  As I stitch I just keep rolling the cord in shape until I get a nice round shape.


Hide the stitches inside the shape. 

Make sure your needle goes through both sides of the area being sewn.  In other words catch with the needle the cord already sewn in the shape you are making and then in the cord being added to the shape.

Put needle through both sides of the sewing area.

Put needle through both sides of the sewing area.

 Continue sewing until you come to the end of the orange part of the knitted cord.  The green part I started with will be the stem of the pumpkin so that won’t be sewn down as with the orange.  This needs to stick up.  If for some reason the stem doesn’t stay up, you can sew a couple of tack stitches right at the base of the stem to stabilize it (right where the pin is.) But remember not all pumpkin stems are straight. J


The pin shows where to tack the stem so it is upright. 
                          
So here is our finished pumpkin.  It is about 5” wide by 5”  high (6 ½” if you include the stem.  It can be used as a coaster or just a table decoration or string some yarn though the stem and hang it from a Halloween tree (if you do that) or on the wall.


The finished pumpkin 

    ©2016 Cheryl Fillion