Friday, May 26, 2017

Paper Plate Spiral

Where I live the farmers market is open.  This means for me, the Kid’s Craft at the Market is also open.  The craft for this month is the paper plate spiral.

I personally enjoy this craft.  It is easy and creative and just fun to watch the finished product.  All you need is a paper plate, crayons, scissor, hole punch and yarn or string.

For the plate, the flimsy non-wax coated plates are the best.  It is best for coloring.  The wax or plastic coating on them does not allow for a rich deep color to show up.  And if the plate it thick it is hard to cut out the spiral.  I found my plates at a discount store.


The first thing I do is draw a spiral on the plate. Don’t cut to the spiral yet.  It is easier for the child to color if the plate is still intact. I do the spiral first in case the young artist wants to do a design along the spiral. 


When the artwork is done, explain to the child that you are going to cut into the plate to make the spiral.  (You might even want to do one yourself to show him how it will look.)
Cut carefully.  Once you have finished cutting, poke a hole at one end.  I usually do it at the middle of the plate because I have a bigger area for the hole.


String a piece of yarn or string through the hole and tie it in place.Then you and the young artist can decide where to hang it and watch it twirl in the wind.  I did this craft at the market last year and it was a big success.


My favorite memory of it was watching one little girl walk away holding the string of her spiral and bouncing the spiral along the ground as she walked as if she was walking a dog.  I love kid’s imaginations.

Try this one lazy summer afternoon or a rainy summer afternoon.  I bet you will have spirals all over your yard in no time.


©2017 – Cheryl Fillion

Friday, May 19, 2017

The Healing Effects of Creating

For most of my life I have been involved in crafts.  I learned crewel embroidery at the age of 9 and progressed to cross stitch, needlepoint, macramé, ceramics eventually moving to making bears, quilts, dolls, now weaving punchneedle and needlefelting.  I have done just about everything except knitting and crochet (just can’t get the hang of those techniques).

I do crafts for the pleasure of it.  I make crafts for gifts for those people who are important in my life.  I even opened a quilt shop so that others could enjoy making quilts.
I now sell my creations and supplies for other people’s creations in my etsy shop And even though I now sell some of what I make, I still do crafts for the pleasure of it. 

The one thing that most people don’t consider is the healing properties of crafts.  I don’t just mean being able to keep yourself active and alert with patterns and colors which is important.  I mean the solace that creating or receiving a craft can be for yourself or someone else. 

I first realized this over 20 years ago when a friend of mine lost her husband suddenly.  I wanted to wrap her in love and couldn’t figure out a way until I began to make a heart quilt for her.  That quilt showed her my love but it also gave me something to concentrate on when I felt so helpless to relieve her grief.

The next year I lost a colleague from the Big Brothers/Big Sisters organization.  I had promised myself when I had time I was going to make a wall hanging of the organization’s symbol for her.  I never had that chance.  After her death it became all the more important for me to keep that promise – for myself.  So I created the wall hanging and presented it to her husband who was deeply touched and understood how much his wife contributed to the lives of others.

After September 11, 2001, all I wanted to do was make little angel dolls. For the reasons all of you can imagine, I wanted to be surrounded by angels. In recent months, I have been helping a group make Quilts of Valor for returning soldiers.  Just like a quilt gives you comfort, so do these quilts comfort our military and hopefully show them they are important to us.

I do a little healing for myself each time I create something. Each item is a reminder to enjoy the present moment.  While I love the finished product, I mostly enjoy the process of creating.  The texture of the fibers soothes me.  The color brightens my day.  Often times what I create – especially my dolls –  makes me laugh.  And I cannot stay sad or angry when I create.

So when you are having a bad day or when someone else is, use your creativity to help someone else or yourself feel better.

© 2017 – Cheryl Fillion


Friday, May 12, 2017

The Little Red Tomato


As I mentioned in an earlier blog, I enjoy needle felting.  I also enjoy tomatoes.  Those two subjects seem a bit unrelated, don’t they?  Not if you needle felt little red tomatoes like I do.

If you want a little red felted tomato, you need to start with red roving.  Now you can make your tomato entirely of red roving but I like to start with a polyester batting base.  Why have nice red roving hidden in the center of your tomato where it can’t be seen?  I usually try with sculptured items to start with a plain base or polyester or wool batting. 


So gather a bunch of either wool batting or even cheaper still polyester batting (Yeah like you use in pillows.).  I usually start with a ball that is twice the size of what I imagine the finished item to be.  
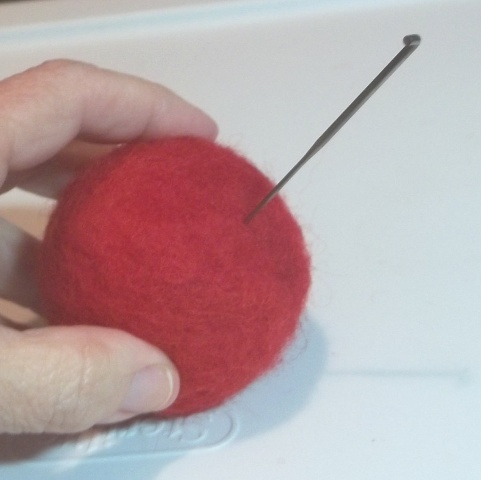
As you needle felt it, it will shrink down and become firm.  Roll it in your hands to start forming the ball you want.  Rolling it in your hand actually starts bonding the fibers together and then start felting.

batting


Keep felting until you get the size and shape you want with your ball. If you need to add more batting, wrap more  around the shape and felt it in.


batting shape


Once you have the base the shape you want, now comes the fun part, adding the color.  I started laying strips of red roving onto the ball base and just felted it in until it was all covered.

completely covered

adding red roving


This next step is optional.  Since you have a ball, it is likely to roll around.  If you want your tomato to stay in one place, find an area on the tomato and start felting over and over in that place (usually about an inch in diameter is a big enough area).  The more you felt there, the flatter the area will be so when you set your tomato down, it won’t roll.


Flattening bottom

All tomatoes have a little leaf and stem part that attaches to the vine.  So will this tomato.
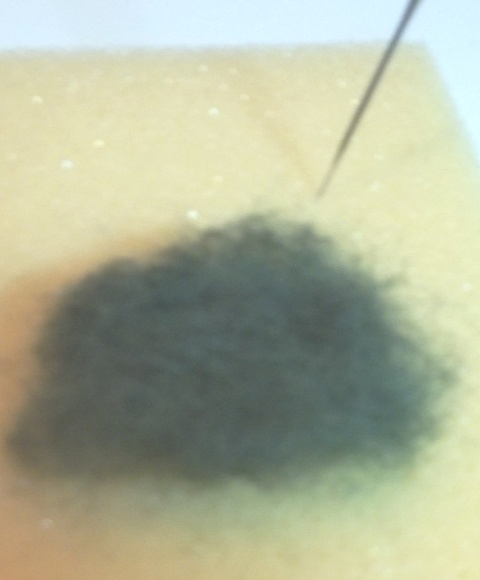
Take a small amount of a green roving and place it on your foam.  It doesn’t have to be a lot – maybe 2” by 2”.  Make it a little bigger than the size you want your leaves to be.  Then place another piece of roving crosswise to the first piece and start felting.


leaf roving
leaf roving 2


felted leaf roving


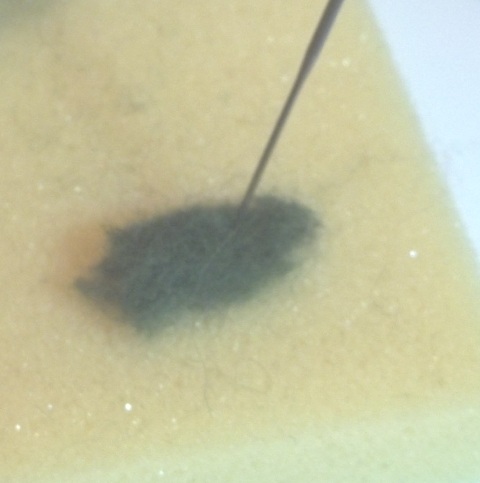
Keep felting until all the fibers seem to be bonded and there are not any thin spots that you can see through.  Add more roving if you need to. You want to have somewhat of a square shape.  When you are ready, cut your leaves.  I don’t use a pattern but you can make one and use.  I take one side of my leaf square and cut out a triangle. I do that on each side so in the end I have a 4 sided star.  It’s OK if it is a little lopsided.  Not all leaves in nature are perfectly symmetrical.
cutting roving for leaves

cutting roving for leaves 2


finished leaves

Now with your tomato find the area opposite your flat surface.   We are looking for the top and felt a little indentation.    This will help the leaves and stem felt into the tomato easier.  Place the center of your leaf star over the indentation and felt it in until it is attached.  Some of the leaf points may stick out or up.  You can leave them like that (since that is often what real leaves do) or you can felt them to the tomato.  Just give it a couple of pokes at each point to attach it.


indentation for leaves
Adding leaves


attaching tips of leaves


Now for the stem.  I am one who does not like to waste anything so I usually take a couple of pieces the cutaway of the felted green from the leaves and start to form them into a stem.  I start with two of the triangles and roll them together in a rounded rod shape.   Just as you did with the tomato ball above, roll these pieces between your palms to start the rod shape.   Once you have a good shape, start felting to make the roving look like a stem and also make it firmer.  You wanted it to be a little bigger at one end so it looks more like a stem.


finishing stem
starting stem


Once you have it the shape you like, put the bigger end in the indentation of the leaves and start felting.  You might want to put your needle in on an angle to get through the stem and into the tomato.  But remember to pull your needle out the same way you put it in so it doesn’t bend or break.


attaching stem

Once your stem is secure (I usually pick it up by the stem and shake the tomato.  If the stem stays on, it is secure.), you have a little red (felted) tomato.  It is a great summer decoration or a wonderful gift for a farmer or tomato lover.


The Little Red Tomato


©2017    Cheryl Fillion


Friday, May 5, 2017

My Wreath of HOPE

For the past ten years, I have been involved with the American Cancer Society’s Relay for Life.  It is an event to raise money for cancer research and services for cancer survivors. It is a walking event where a team of people take turn walking a track in support of cancer survivors.

This year I decided to leave little items around for people to find.  And as a result I played around with my spool knitter and yoyos.  I made little purple spool knitter wreaths and wrote HOPE on yoyos which I attached to the wreaths. Purple is the color for the Relay.

HOPE Wreath


I have a big cone of 2 ply purple yarn.  It is too thin to make a thick spool knitted cord. So I pulled some off on to empty thread spools and with some white crochet thread I used the three threads together. This gave enough thickness to make a nice cord.  


yarn and thread


I made my beginning and ending threads longer than I normally do so I could tie the ends together and make a bow and hanger for the wreath.  (Check out my earlier blog on spool knitting)
wreath


I then made a white oval shaped yoyo (sew it the same as a circle yoyo just start out with an oval shaped piece of fabric.  Check out my earlier blog on yoyos.) and with a fabric pen wrote the word HOPE on the yoyo flat side and then sewed it on the wreath.

HOPE yoyo

 
The night of the Relay I left some around the track as I walked a lap. They were gone when I went back to look.  I am hoping someone enjoys the wreaths and that the wreath and its message brought a smile to someone’s face.


©2017 Cheryl Fillion