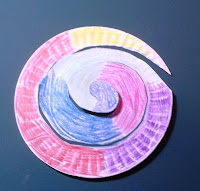
Where I live the farmers market is open. This means for me, the Kid’s Craft at the
Market is also open. The craft for this
month is the paper plate spiral.
I personally enjoy this craft. It is easy and creative and just fun to watch
the finished product. All you need is a
paper plate, crayons, scissor, hole punch and yarn or string.
For the plate, the flimsy non-wax coated plates are the
best. It is best for coloring. The wax or plastic coating on them does not
allow for a rich deep color to show up.
And if the plate it thick it is hard to cut out the spiral. I found my plates at a discount store.
The first thing I do is draw a spiral on the plate. Don’t
cut to the spiral yet. It is easier for
the child to color if the plate is still intact. I do the spiral first in case
the young artist wants to do a design along the spiral.
When the artwork is done, explain to the child that you are
going to cut into the plate to make the spiral.
(You might even want to do one yourself to show him how it will look.)
Cut carefully. Once
you have finished cutting, poke a hole at one end. I usually do it at the middle of the plate
because I have a bigger area for the hole.
String a piece of yarn or string through the hole and tie it
in place.Then you and the young artist
can decide where to hang it and watch it twirl in the wind. I did this craft at the market last year and
it was a big success.
My favorite memory of it was watching one little girl walk
away holding the string of her spiral and bouncing the spiral along the ground
as she walked as if she was walking a dog.
I love kid’s imaginations.
Try this one lazy summer afternoon or a rainy summer
afternoon. I bet you will have spirals
all over your yard in no time.
©2017 – Cheryl Fillion


No comments:
Post a Comment