The block is a simple 4 – 4inch half square triangle blocks next to an 8 inch half square triangle block. Each block has gray fabric along with a solid color which pretty much uses the color wheel.
 |
| Basic Block |
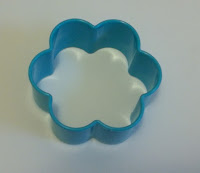
The embellishment design is a flower cookie cutter. The first two blocks I finished were a
couched fancy yarn and then an
spoolknitted cord.
 |
| Cookie Cutter |
The next three were appliqué in different techniques. My favorite appliqué technique is with the
button hole stitch. You draw your
design on a fusible mesh (the paper side of course. A fusible mesh is a layer of glue on a sheet
of paper.). Cut out the design and iron
it on the wrong side of the fabric. Cut
out the fabric, peel off the paper and then iron that fabric on to a base
fabric.
 |
| Buttonhole Applique |
So with this block I ironed the flower shaped mesh on the
back of the green fabric, cut it out and ironed it on the red. Then to secure it even more I embroidered a
buttonhole stitch around the edge. You
can use other stitches as well. You can even use stitches from your machine to
secure it down (that is not one of my skills).
By the way, it will stay on the base fabric without stitching it down if the quilted item is a
wall hanging and not likely to be washed. I used matching embroidery floss but you could use whatever
color thread or floss you want.
 |
| Needle Turned Applique |
The second appliqué block I did was using the needle turn
appliqué. This time you want to draw the
design on the front of the fabric, cut it out with an 1/8 -1/4 seam allowance
and as you stitch it down, turn (with the needle) the seam allowance underneath
the appliqué piece.
I can teach a lot of techniques as you know from my
tutorials, but in the case of appliqué and embroidery I am not very experienced. Your best bet is to find some YouTube videos
or take a class at your local quilt shop.
 |
| Needlefelted |
The third block is only an appliqué of sorts. I needle felted the flower with some of my
fancier dyed wool batting and then tacked it or you could say appliquéd it down
to the block. I showed how to do this in
my tutorial, Needle Felting in Cookie Cutters.
I like how this is turing out. Each technique gives a
slightly different view of the flower shape.
So as I named it, it looks the same but different. Hopefully soon I will have part 3 done
©2019 – Cheryl Fillion
No comments:
Post a Comment